- <GetStart>
- CSPro User's Guide
- The CSPro System
- Data Dictionary Module
- The CSPro Language
- Data Entry Module
- Batch Editing Applications
- Tabulation Applications
- Introduction to Tabulation
- Parts of a Table
- Parts of the Table Tree
- Common Uses of Tabulation
- Capabilities of Tabulation
- Creating Tables
- Formatting Tables
- Formats for a Part of a Table
- Formatting Row, Column, or Cell Data
- Formats for a Table
- Formats for an Application
- Formats for Printing
- Views of Tables
- How To ...
- Customize Table Text
- Hide or Show a Row or Column
- Hide Rows Containing All Zeros
- Change the Number of Decimal Places Displayed
- Add a Footnote (Pagenote or Footnote)
- Add Header/Footer Text to a Table
- Add a Subtitle
- Add Stub Leadering
- Add Borders
- Add Reader Breaks
- Change the Way Numbers are Displayed
- Change the Automatically Generated Text
- Change Fonts or Colors
- Change Indentation or Alignment
- Add Borders to Cells
- Make Captions Span Data Cells
- Reset Format of Table Item to Default
- Change the Repeating of Boxheads
- Change Stub Column Position
- Creating Tables by Geographic Area
- Printing Tables
- Tabulation Preferences
- Saving and Copying Table Data
- Table Post Calculation
- Run Production Tabulations
- Advanced Table Topics
- Table Tips and Tricks
- Data Sources
- CSPro Statements and Functions
- Templated Reporting System
- HTML and JavaScript Integration
- Action Invoker
- Appendix
- <CSEntry>
- <CSBatch>
- <CSTab>
- <DataViewer>
- <TextView>
- <TblView>
- <CSFreq>
- <CSDeploy>
- <CSPack>
- <CSDiff>
- <CSConcat>
- <Excel2CSPro>
- <CSExport>
- <CSIndex>
- <CSReFmt>
- <CSSort>
- <ParadataConcat>
- <ParadataViewer>
- <CSCode>
- <CSDocument>
- <CSView>
- <CSWeb>
Add Borders to Cells
Individual cells have very few attributes that can be changed. Font, color, indentation, alignment, custom text, and number of decimal places are the only ones available.

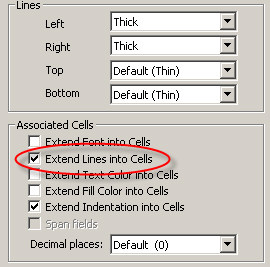
Borders can only be created for cells by setting the borders on the rows and columns that contain the cell. To do this, right-click on the associated stub, caption or column head and choose Format (Stub), Format (Caption) or Format (Column Head) to bring up the Format (Table Part) dialog. For columns, set the left and right lines and for rows set the top and bottom lines. To ensure that line settings are applied to the entire row or column, make sure that Extend Lines into Cells is checked.

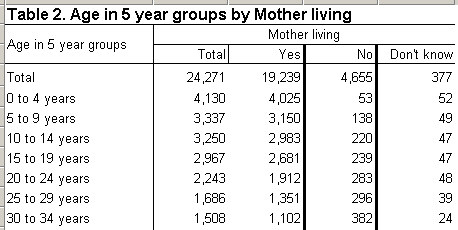
The column header "No" has thick lines set for left and right
and extend into cells is checked
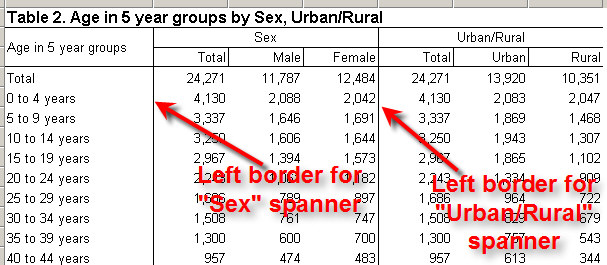
You can also set the left and right borders of a spanner and have them extend into the leftmost and rightmost columns under the spanner. This is done the same way it is done for individual columns. Right-click on the spanner, choose Format (Spanner), set the left and right lines and ensure that Extend Lines into Cells is checked.

By default, stubs and columns have no borders, but spanners have thin lines on the left. This means that cells in the leftmost columns under a spanner will have left borders. You can change these default settings by using the Preferences.
See Also: Formatting Row, Column, or Cell Data, Add Borders to a Table